Guide to Using Aurasma, By Pen Lister. October 15, 2016. Categories: Tutorials and Guides Tags: apps, technology
Terminology: Augmented Reality, Aura, Trigger Image, Overlay, Overlay Actions, Geo location, Geo fencing
From the Aurasma Wikipedia entry : “Aurasma is HP Autonomy’s augmented reality platform. It is available as an SDK or as a free app for iOS and Android mobile devices. Aurasma’s image recognition technology uses a smartphone’s or tablet’s camera to recognize real world images and then overlay media on top of them in the form of animations, videos, 3 D models and web pages.”
Introduction
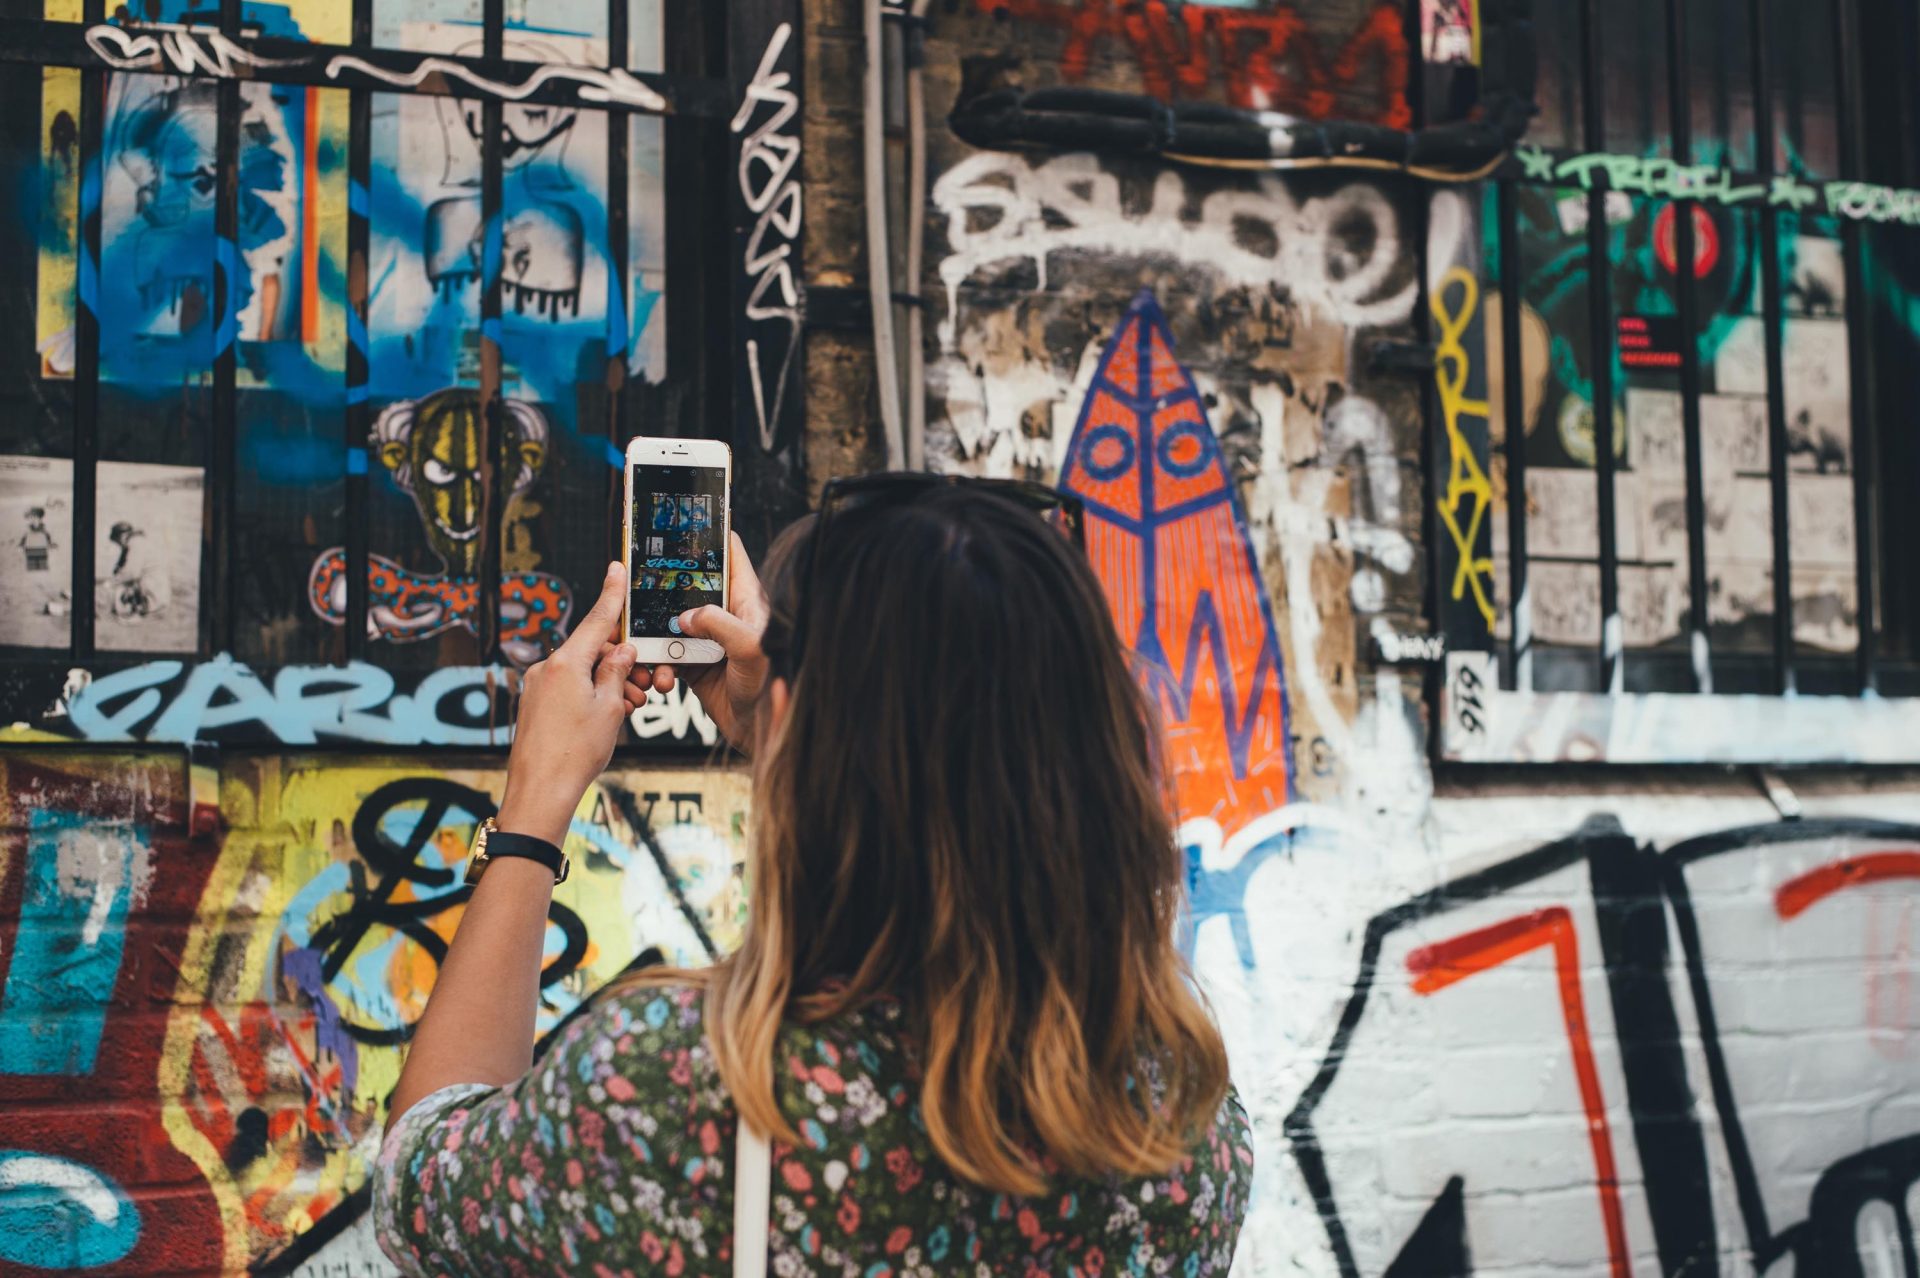
Using Aurasma, a free app, you can create augmented reality interactive experiences. They can be simple, using one static image to trigger a video or audio file, or they can be very sophisticated, overlaying complex 3 D virtual spaces onto real world locations. A simple google search of ‘aurasma in education’ or similar will turn up a lot of blog posts by teachers and others on how they are using it. Aurasma is not only a mobile app, it also has a web based Aurasma studio facility, in which you can create more sophisticated Auras. I recommend you create Auras using this, not just using the mobile version, as you have more control.
How Aurasma works
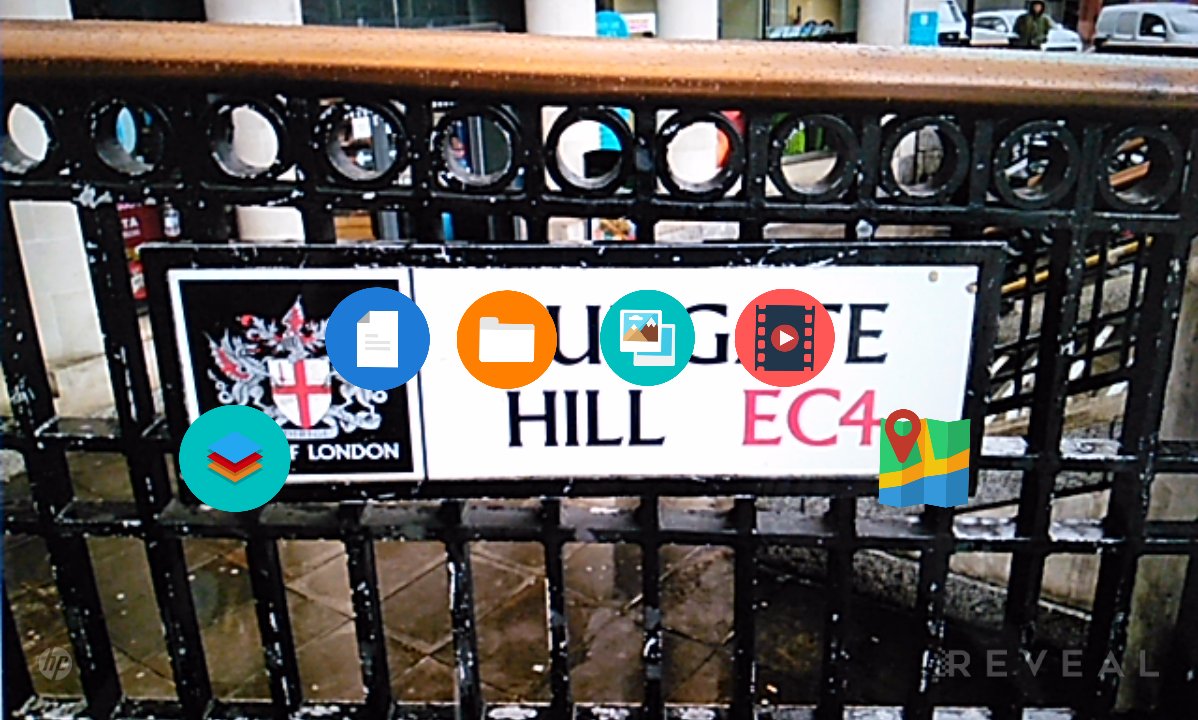
The principal is simple – using a combination of the mobile app camera and attaching behaviours to ‘trigger images’, users see can ‘virtual items’ placed in an augmented real space. These virtual items (think icon with attached function) can be clicked to access further content like video, web pages, social media or discussion threads. They are not difficult to make, however it’s up to you how complex you make each Aura, which is what an Aurasma experience is known as.
The steps to make an Aura using Aurasma Studio, which can be viewed by you and others are:
- Download your preferred mobile app
- Create an Aurasma account
- Go to https://studio.aurasma.com/ and log in using this same account
- Make an Aura:
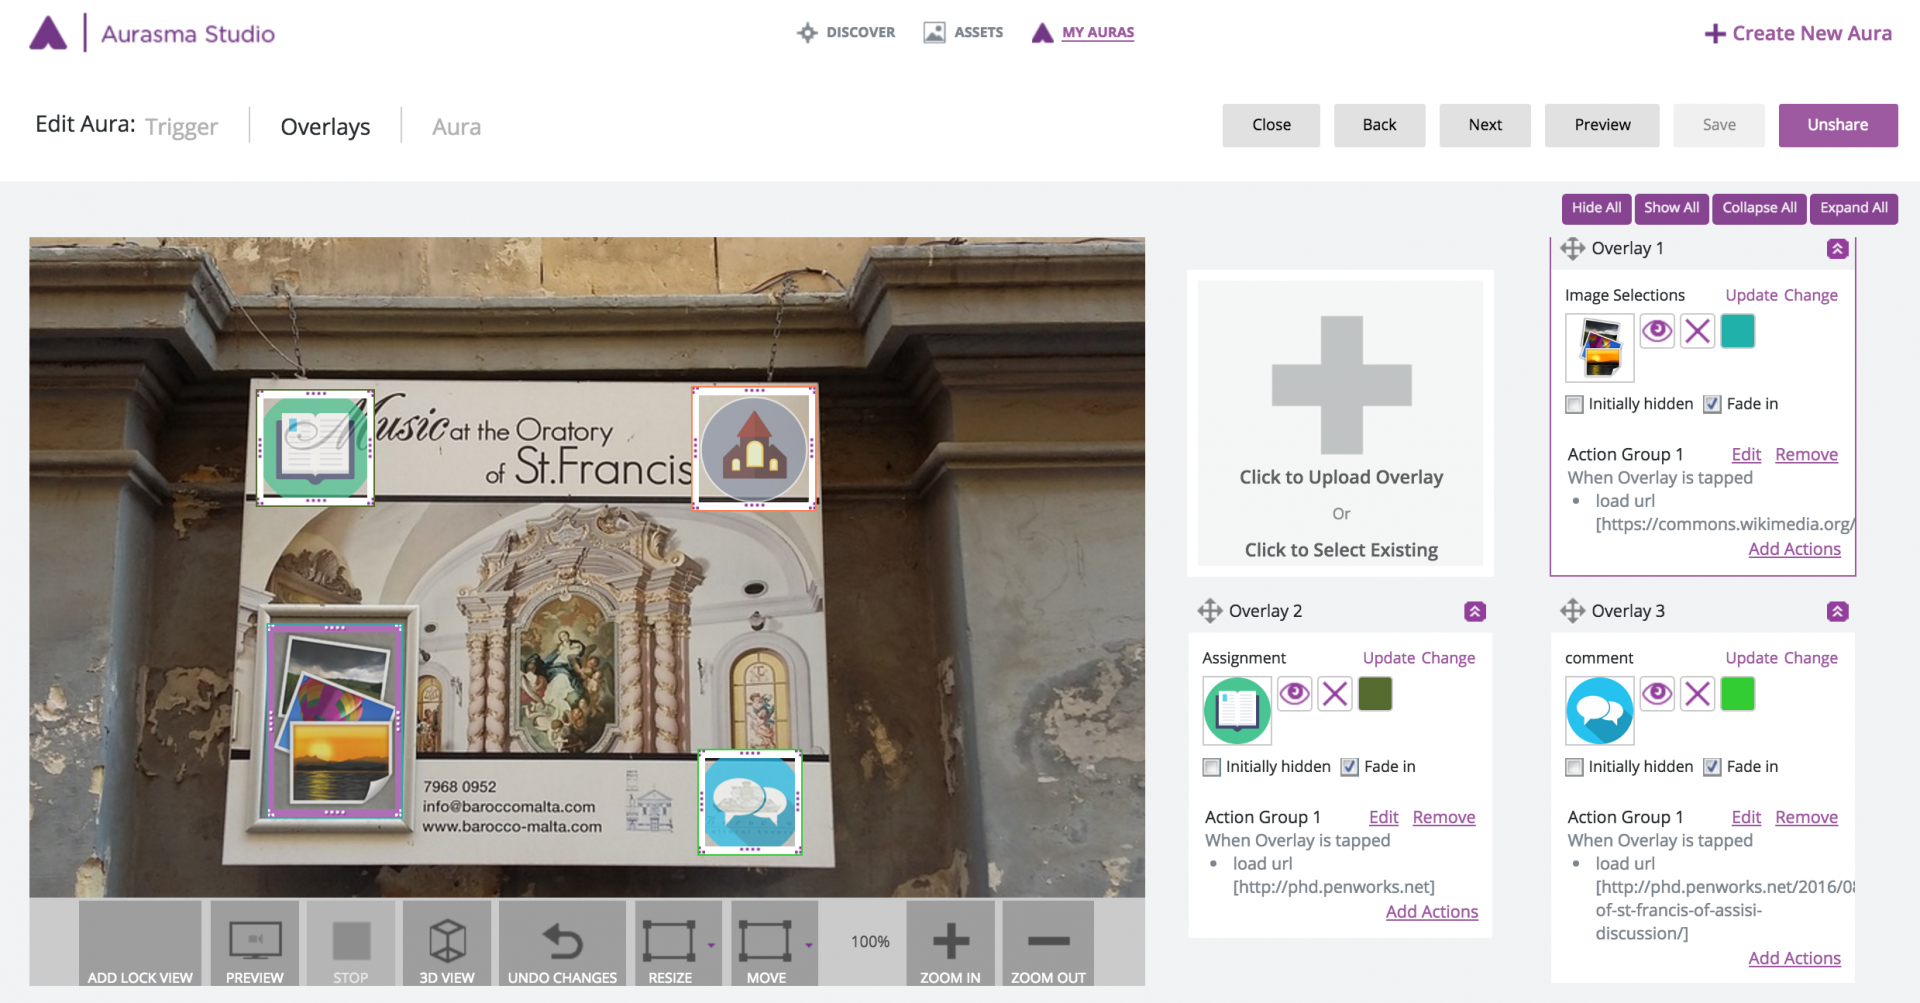
- Select a trigger image, choose something clear without too many different things in it. Try to avoid landscapes or whole buildings as they don’t work too well
- Create an overlay by adding an overlay image and then adding overlay ‘actions’ (see tutorial link at the end of this article)
- To see your aura, or test it before you publish, you must do two things on the mobile app:
- Search for the name of your aura channel – which defaults to your username
- Click on that channel and click the follow button on top left of the channel interface
- Once you are following the channel where your Auras are collected, you will be able to preview them, even though you may not have published them yet. Note: the preview is not 100% reliable, often a preview won’t work, or won’t work every time, yet works fine in the Aura itself.
- That’s it, your Aura should work and others should be able to view it if they follow your channel. Have fun!
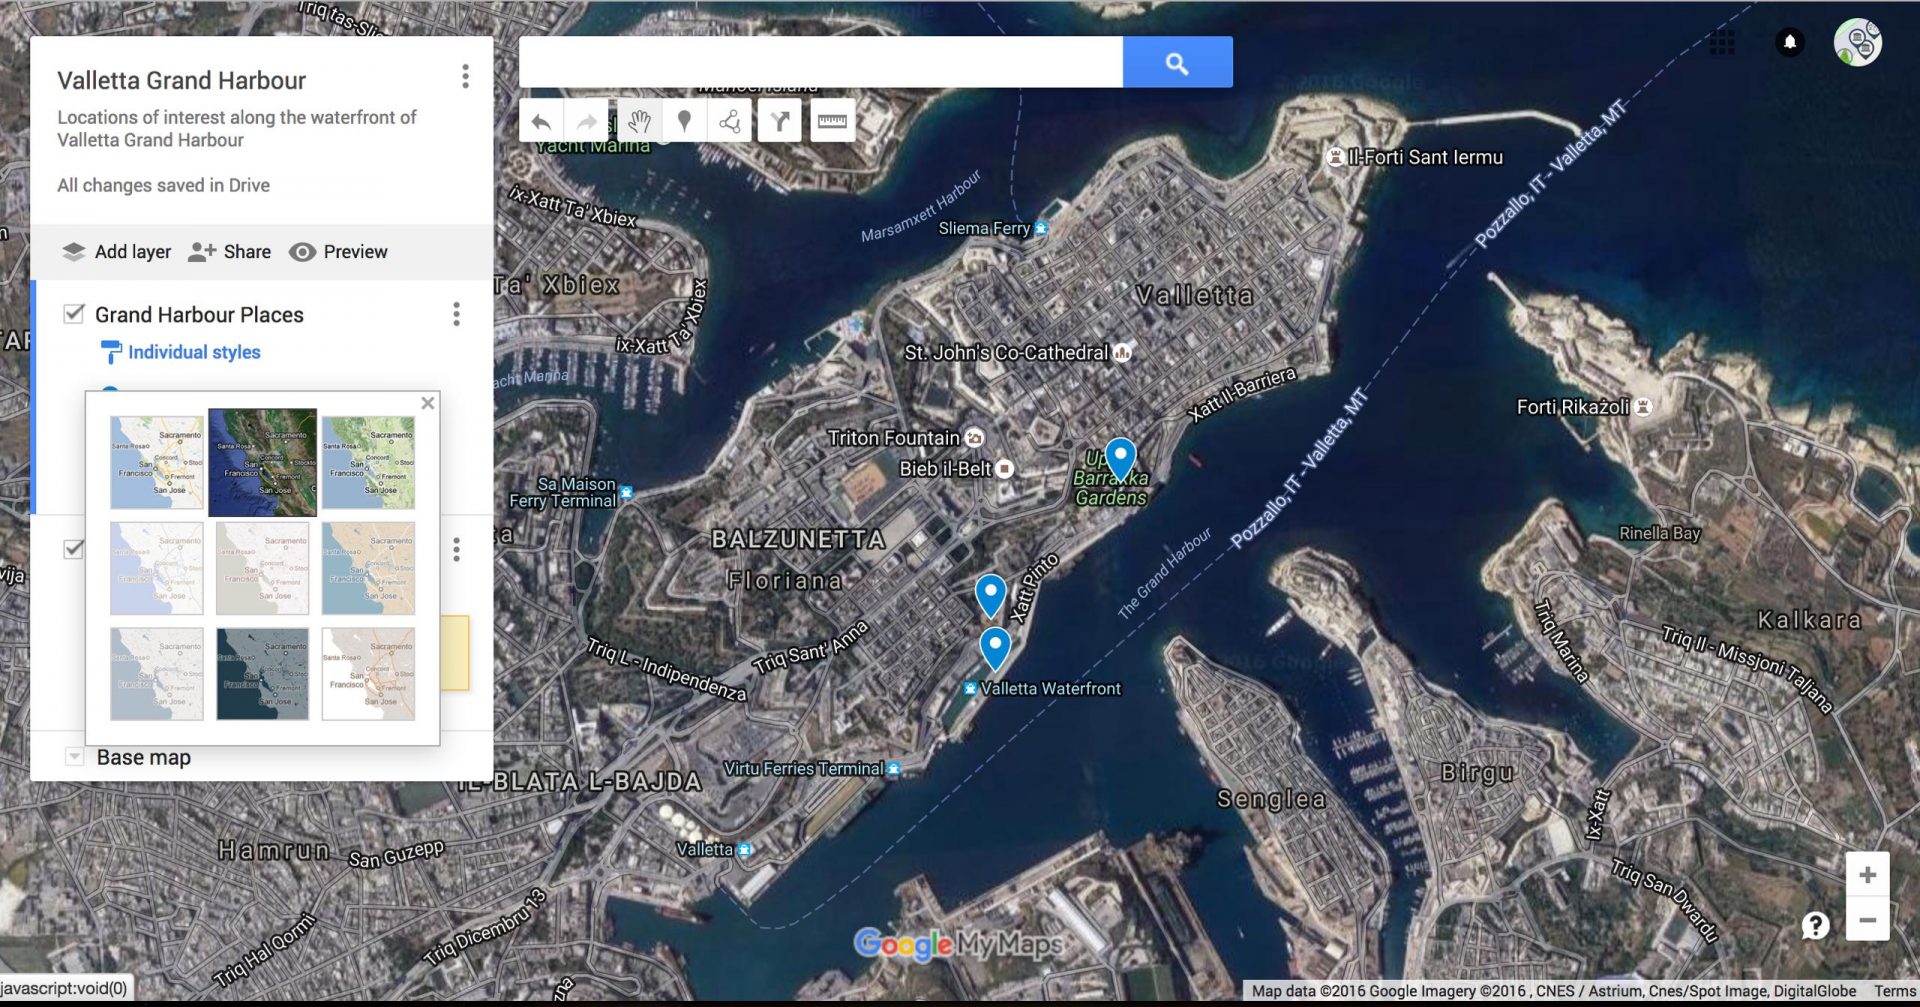
Location Based Auras
It is possible to make an Aurasma Aura only accessible by actually being physically present at a specific GPS location which has been assigned to the Aura. GPS Auras also are visible on the Aurasma aura map if they are set to ‘Public Aura’.
Using 3 D with Aurasma
Using 3 D with Aurasma is more complicated and probably for developers only. 3 D works by importing a file of an already created 3 D environment using 3 D software, and superimposing it on a real world space.
3 D model support is based on the Collada format (v 1.4 or v 1.5), as exported by Maya 2012 and 3 DS Max 2012. Aurasma supports the OpenCOLLADA Exporter and the Autodesk Collada Exporter but recommends the OpenCOLLADA Exporter. (MacQuarie University wiki)
Going further with Aurasma
If you want to explore this further I recommend reading the full article on the Macquarie University education wiki:
Aurasma also have some good notes on creating Auras and using channels and location: