Guide to making a customised Google map, By Pen Lister. October 19, 2016. Categories: Tutorials and Guides Tags: maps, technology
Terminology: GPS, location-based, coordinates, latitude and longitude
This tutorial will guide you through the main steps for creating a customised Google map which can display a series of location points with additional information at each one. A more advanced version of this tutorial will soon be available.
Use the links below to jump to different sections:
- Finding Google ‘My Maps’ and creating a new map
- Understanding the My Maps interface
- Adding a title and description to the map
- Set the background and add a custom location point
- Add a title and additional text/links and images to a custom location point
- Add an existing location point
- Add a ‘route’ between locations
- Adding another ‘layer’
- Map privacy – sharing and making it public
- Embedding the map
Scroll down for each step, or watch the video first, which shows you around the interface of creating a Google custom map.
VIDEO: A brief overview of the Google My Maps interface – no audio.
Step 1. Finding Google ‘My Maps’ and creating a new map
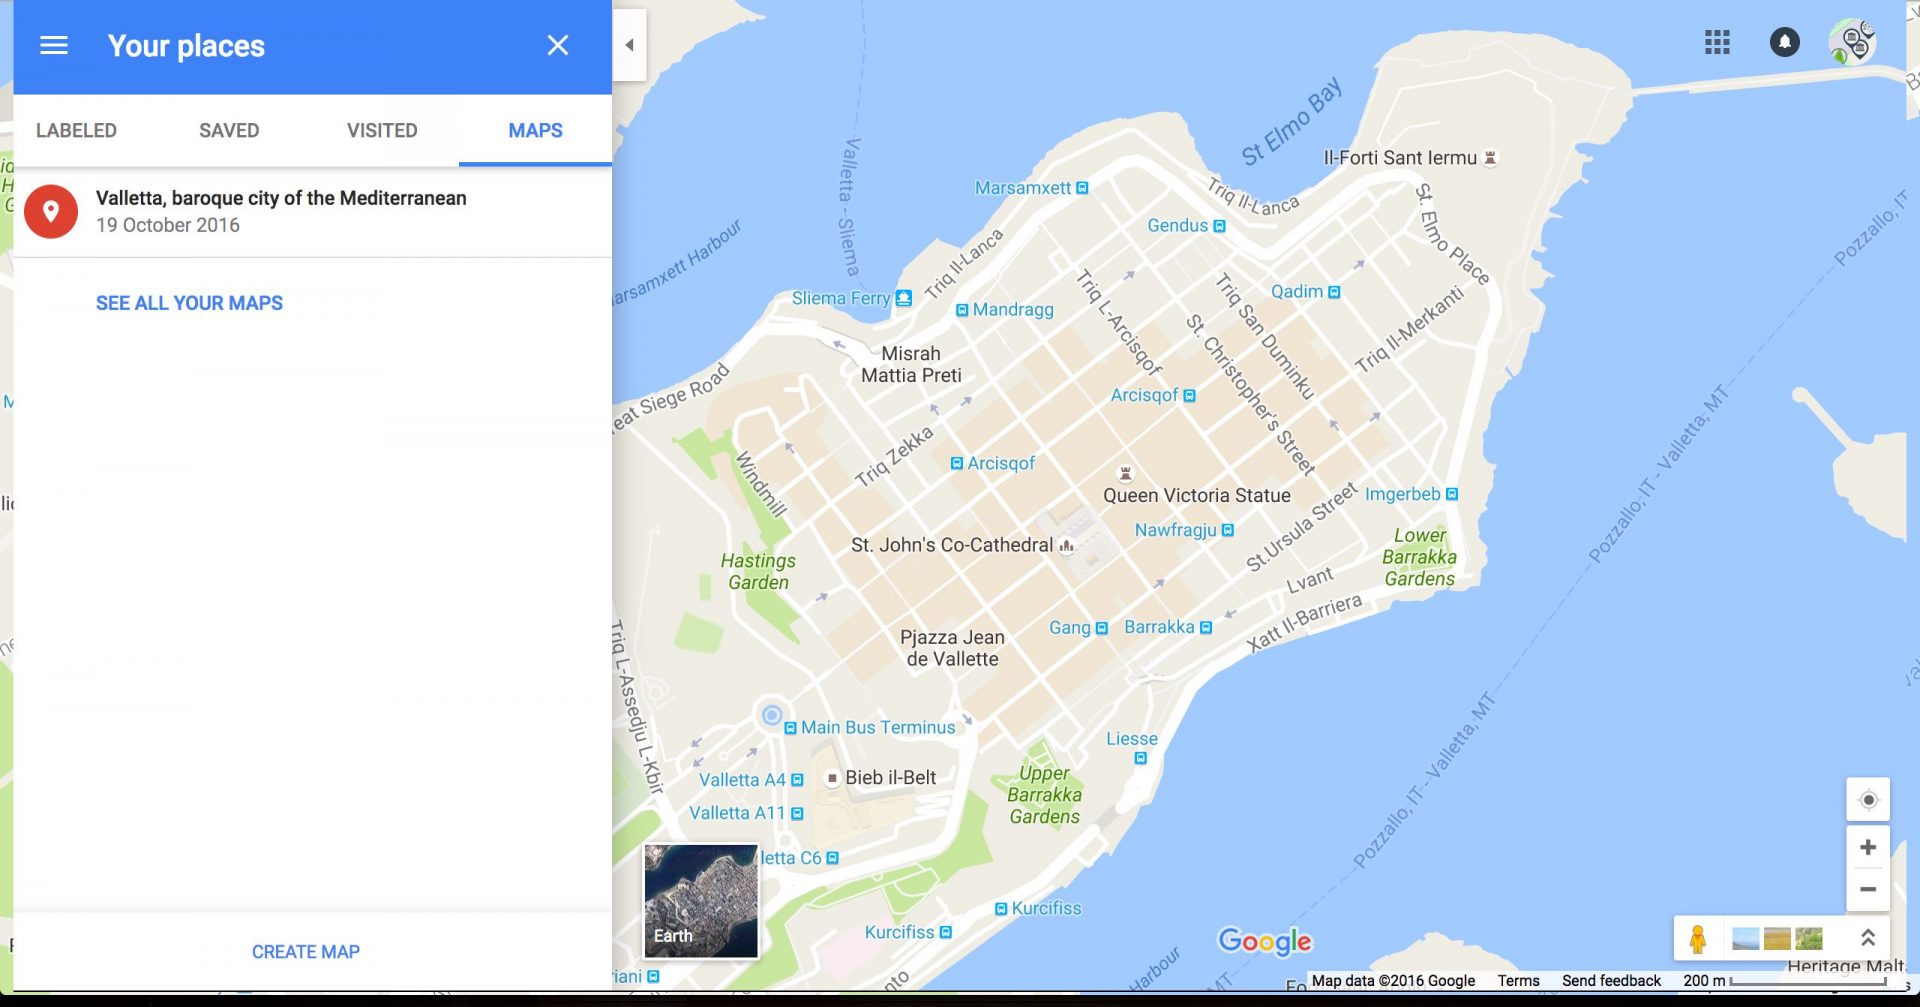
Fig 1 – the Your Places interface.
Open Google Maps, but make sure you’re logged in to Google beforehand – easiest way is to log in to Gmail. Once you’ve opened Maps, open the menu on the left hand side and navigate down to Your Places, click on this and you should see an interface like that shown in fig 1 above. Click on ‘MAPS’. At the bottom of the left hand side you’ll see ‘create map’, so click on that.
Step 2. Understanding the My Maps interface
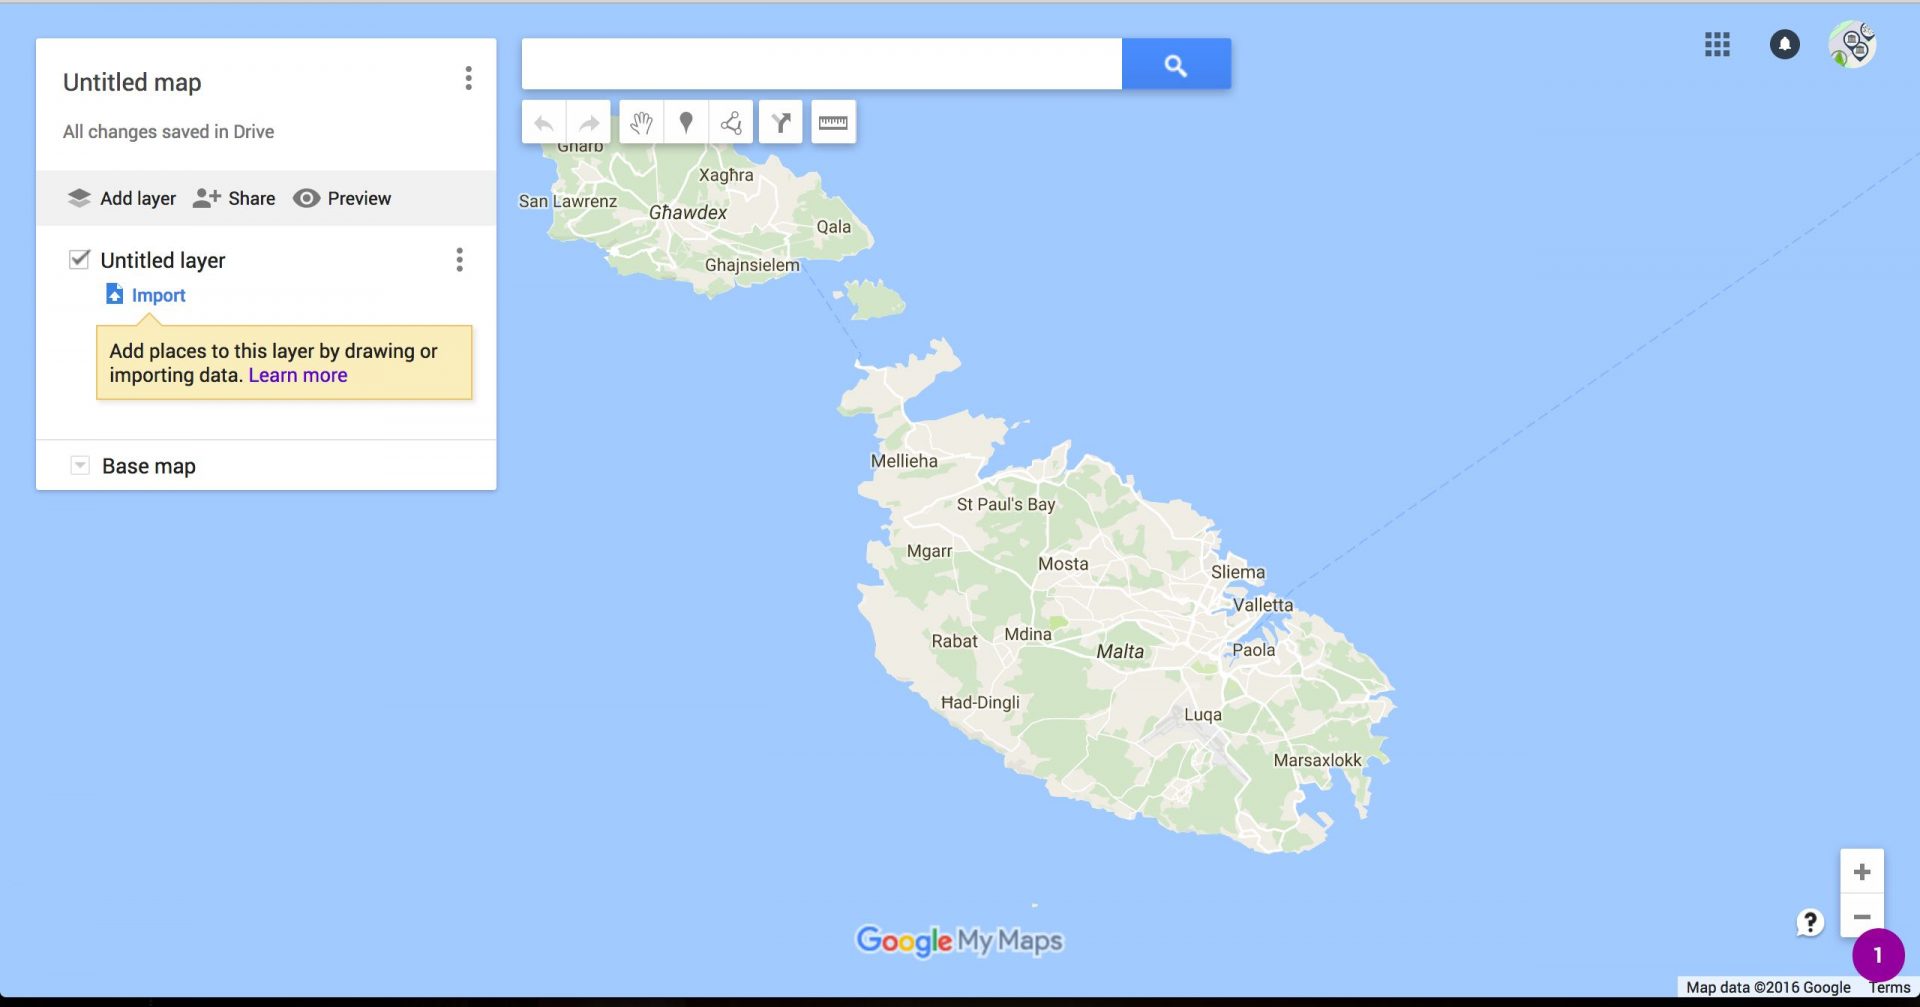
Fig 2 – the My Maps interface.
Once you’ve clicked ‘create map’, you’re in the My Maps interface. The image in Fig 2 shows the interface, with tools on the left panel and map on the right. You can zoom in to the location area of the map thst you want either using mouse or the zoom in/out control at bottom left of the map. The Left panel shows title, description and ‘layers’. These are areas that can have location information, lines and directions placed on them, and turned on and off by the user. The tool strip half way down shows ‘Add Layer’ to add layers (;)), ‘Share’ for privacy and ‘Preview’ to preview your map as users would see it.
Step 3. Adding a title and description to the map
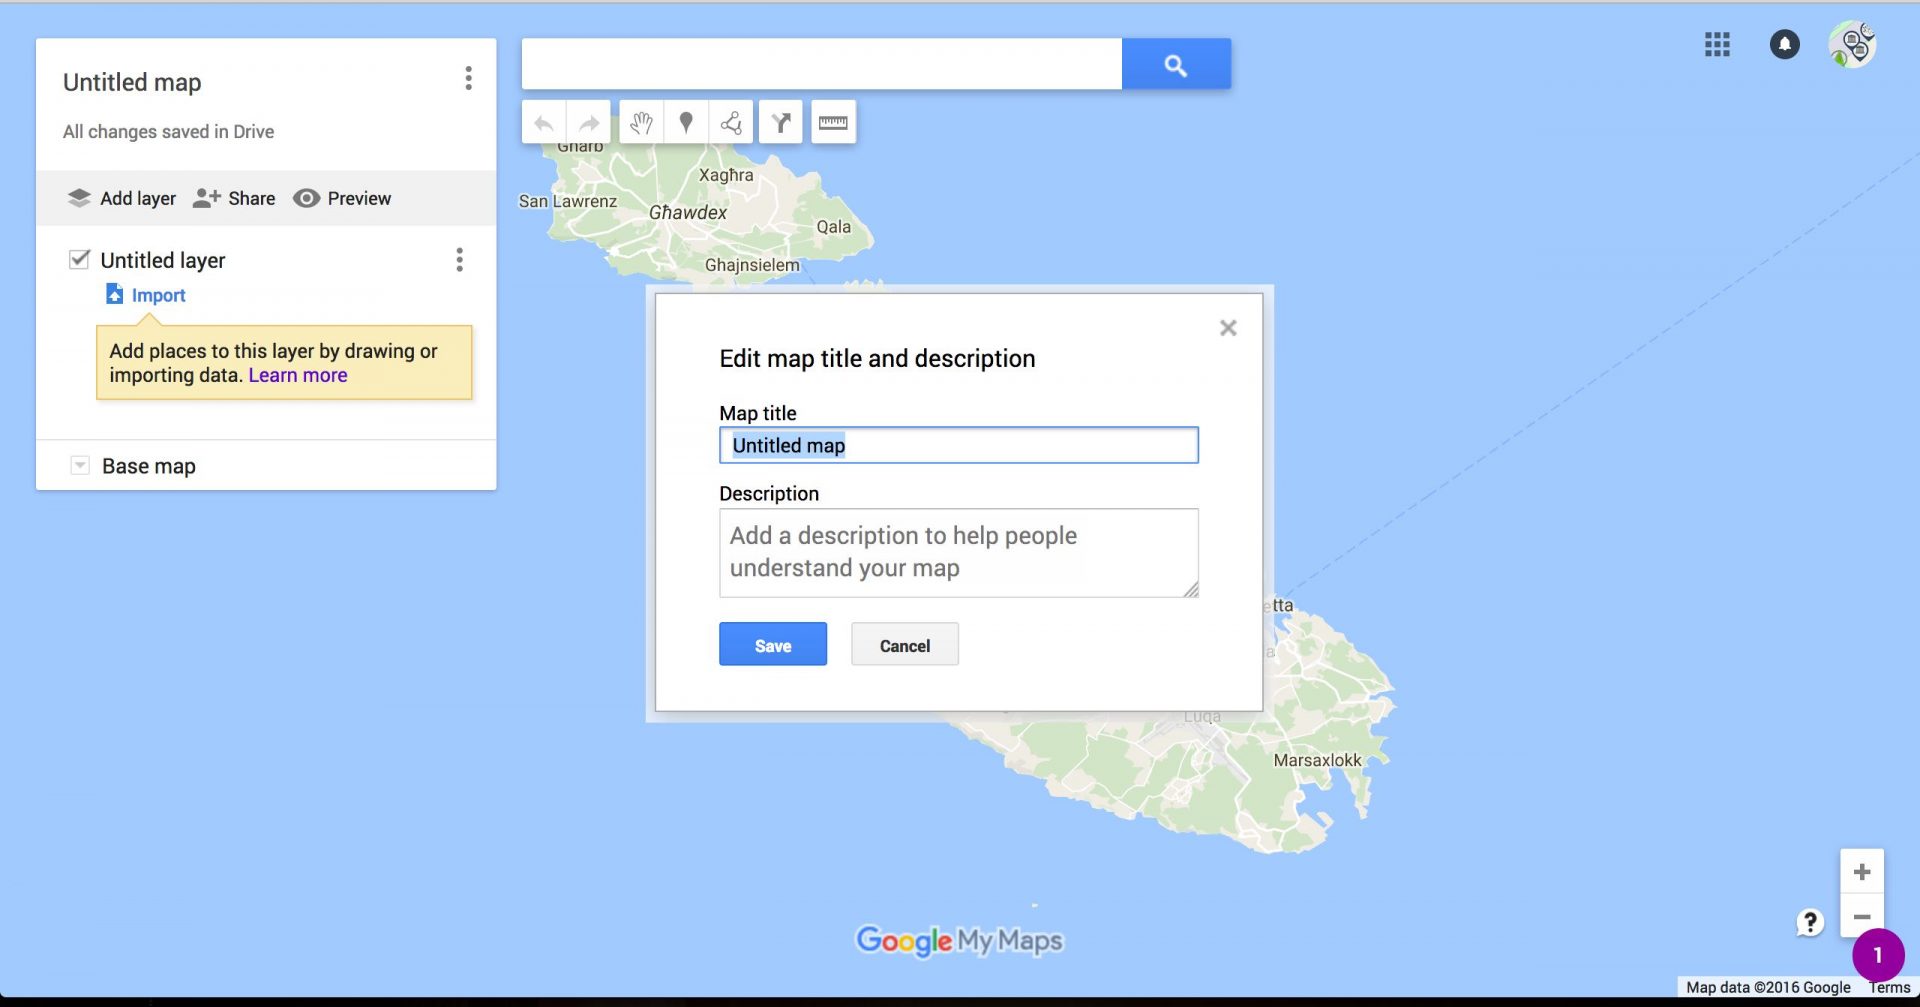
Fig 3 – the ‘dd title and description’ panel.
Clicking on the title (Untitled Map) will open the small panel which allows you to give your map a name and also add a brief description. Click save to save this info.
Step 4. Set the background and add a custom location point

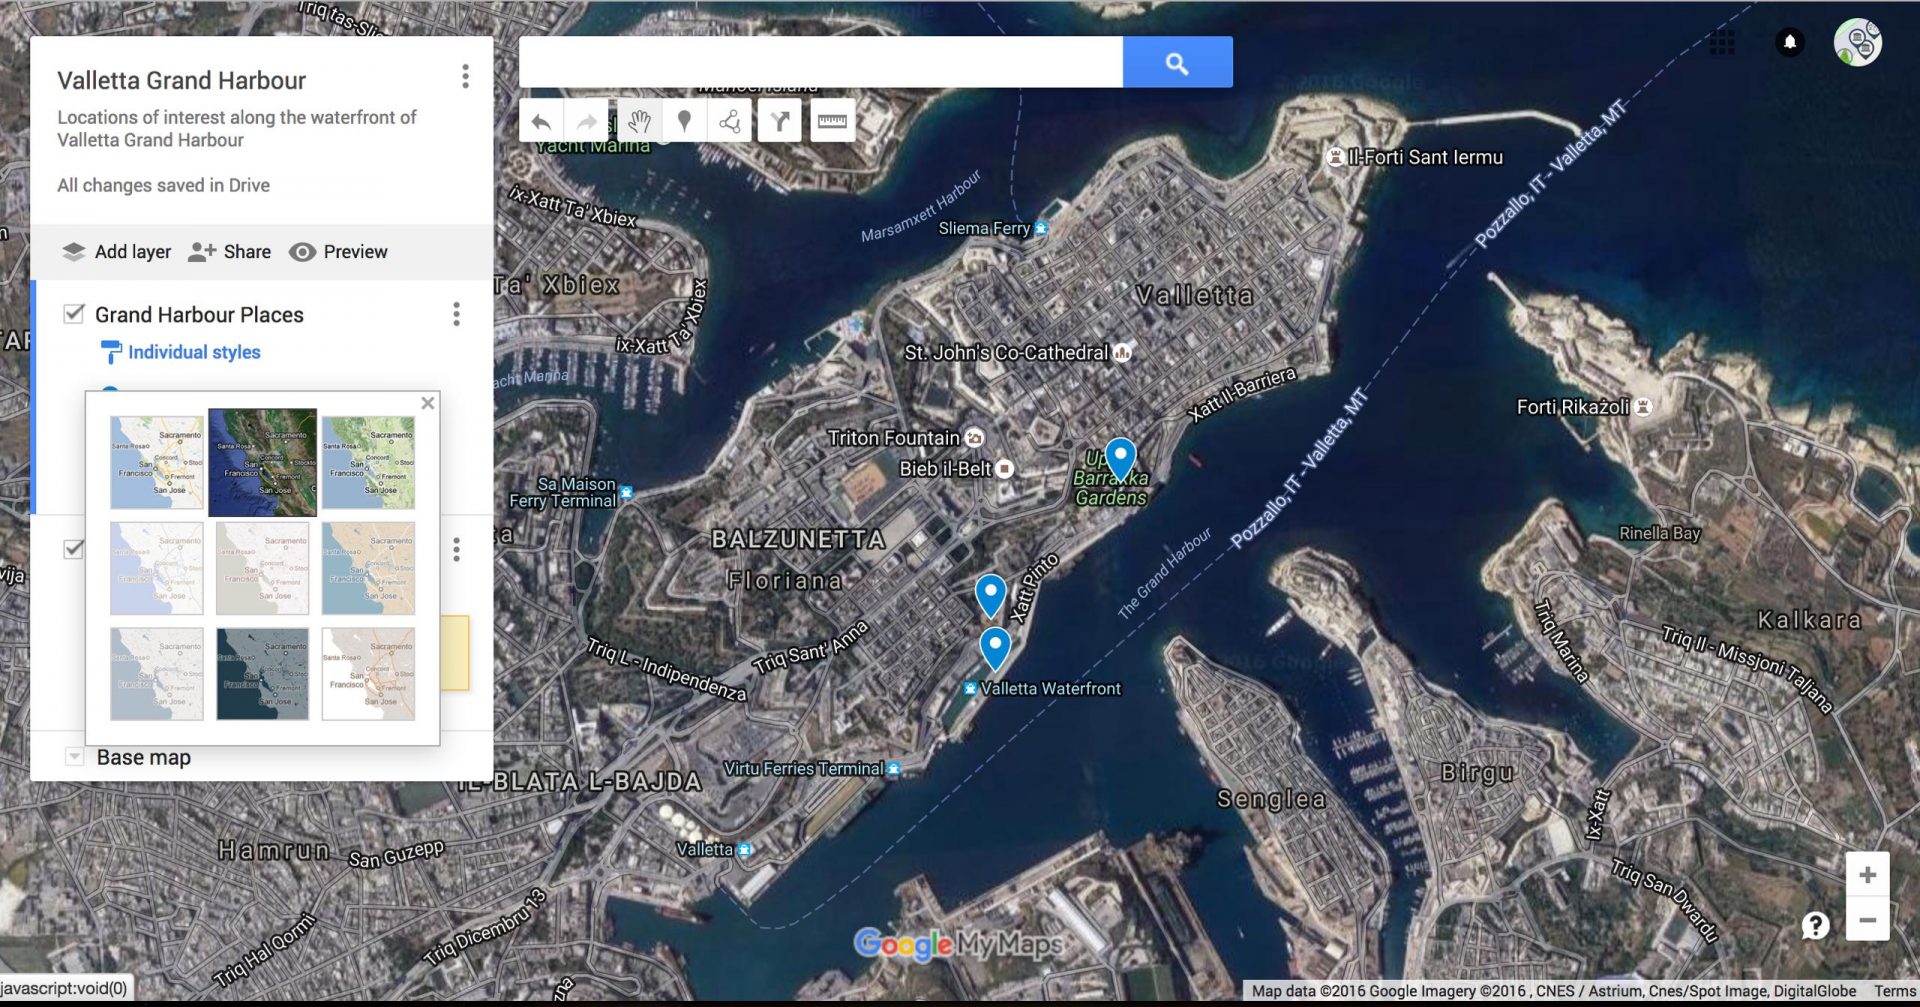
Fig 4 – Terrain choices for map background.

Fig 5 – The location tool, plus drag and drop.
Fig 4 shows the terrain choices you can have for how the map looks. SOme people favour the ‘line map’ we are used to seeing most, but others like the sattelite view. Fig 4 also shows some locations on the map.
Fig 5 shows the location tool cicrcled in orange. CLick on that and drag and hold to drop in the desired location. You can move it around once it’s on the map so don’t worry if you don’t get it right first time! You can also customise colors of location points (see later in the tutorial).
Step 5. Add a title and additional text/links and images to a custom location point
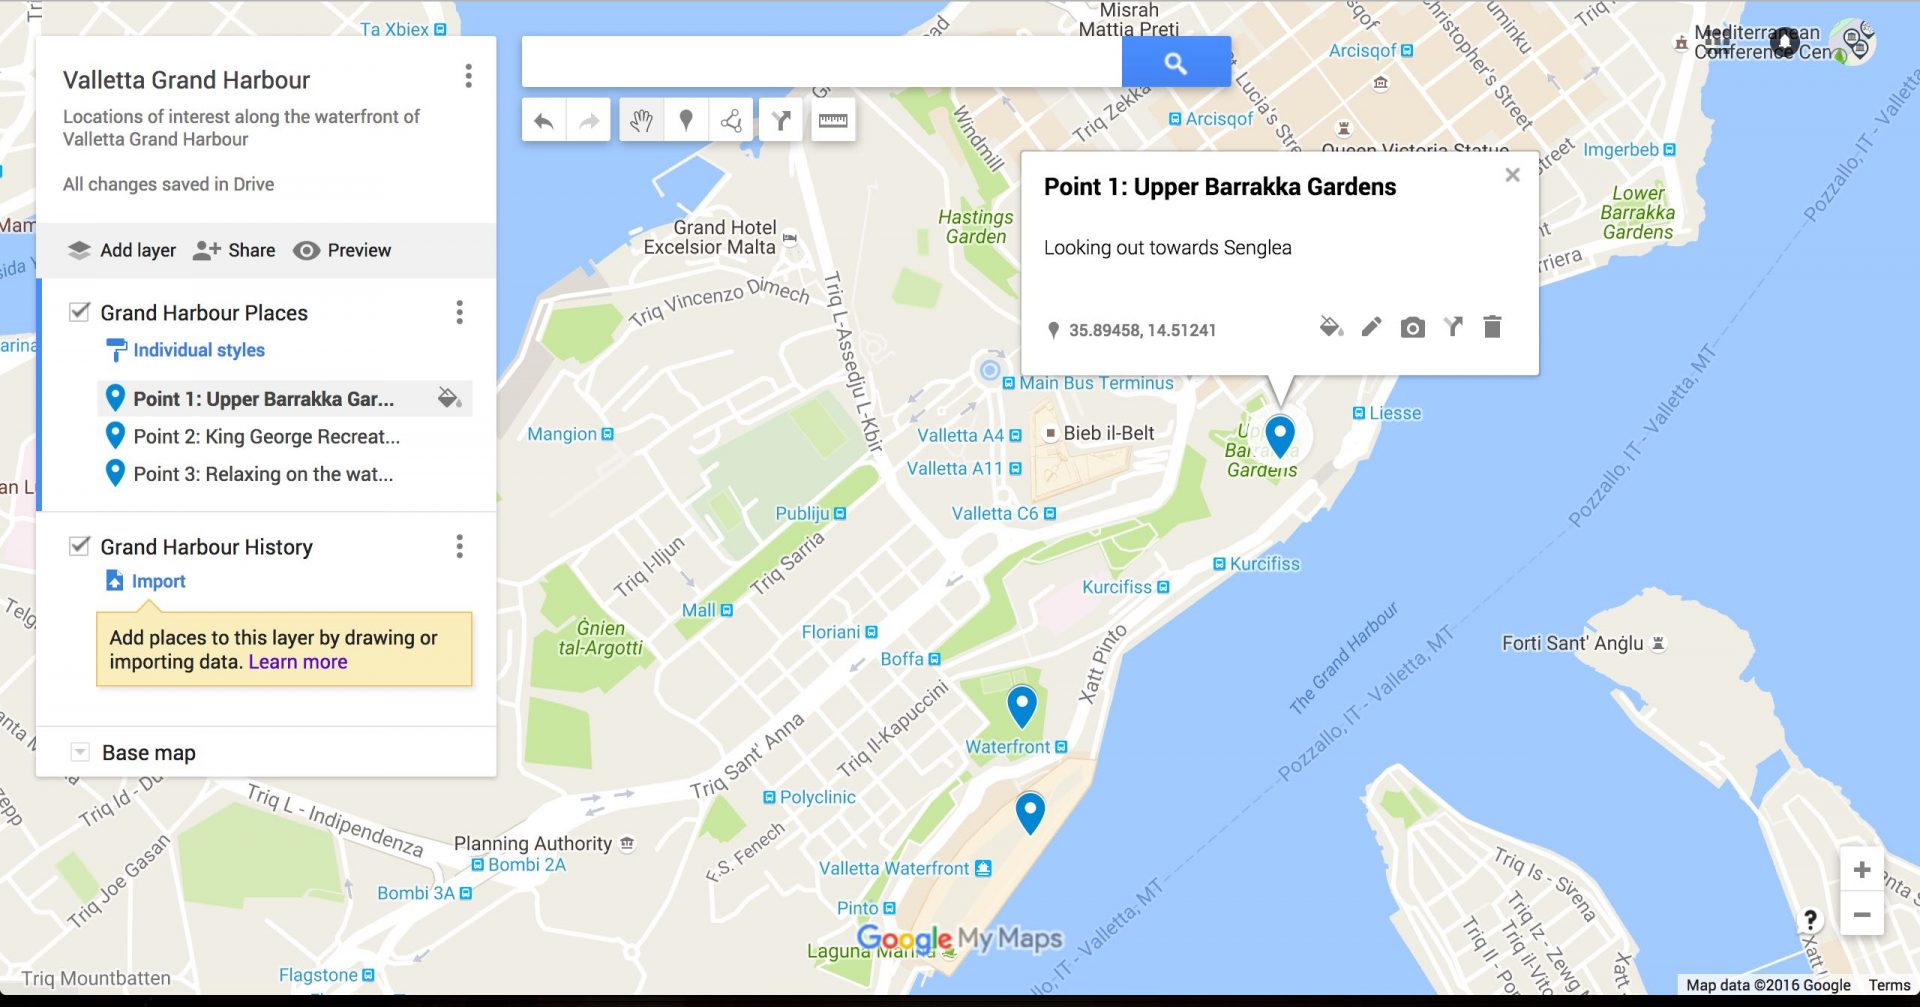
Fig 6 – Showing a location pop up to add location point name and additional text, images or links.
Looking at Fig 6 we can see the pop up that appears when you click on the custom location point you have added. You can add text, images and links to this pop up by clicking on the tool icons in the lower left of the pop up window. This information you add also appears in the left hand panel to a user (see later Fig) when they view the map, not only in the pop up when the location is clicked.
Step 6. Add an existing location point
Remember you can also add existing map locations to your own custom map (for example, you may see libraries, parks, public buildings or famous landmarks as existing Google map locations). Simply clicking on an existing location will add it to your own map. You can add your own information (as above) to an existing location point for your own map. Simply click on the tools in the pop up window of the location to do this.
Step 7. Add a ‘route’ between locations
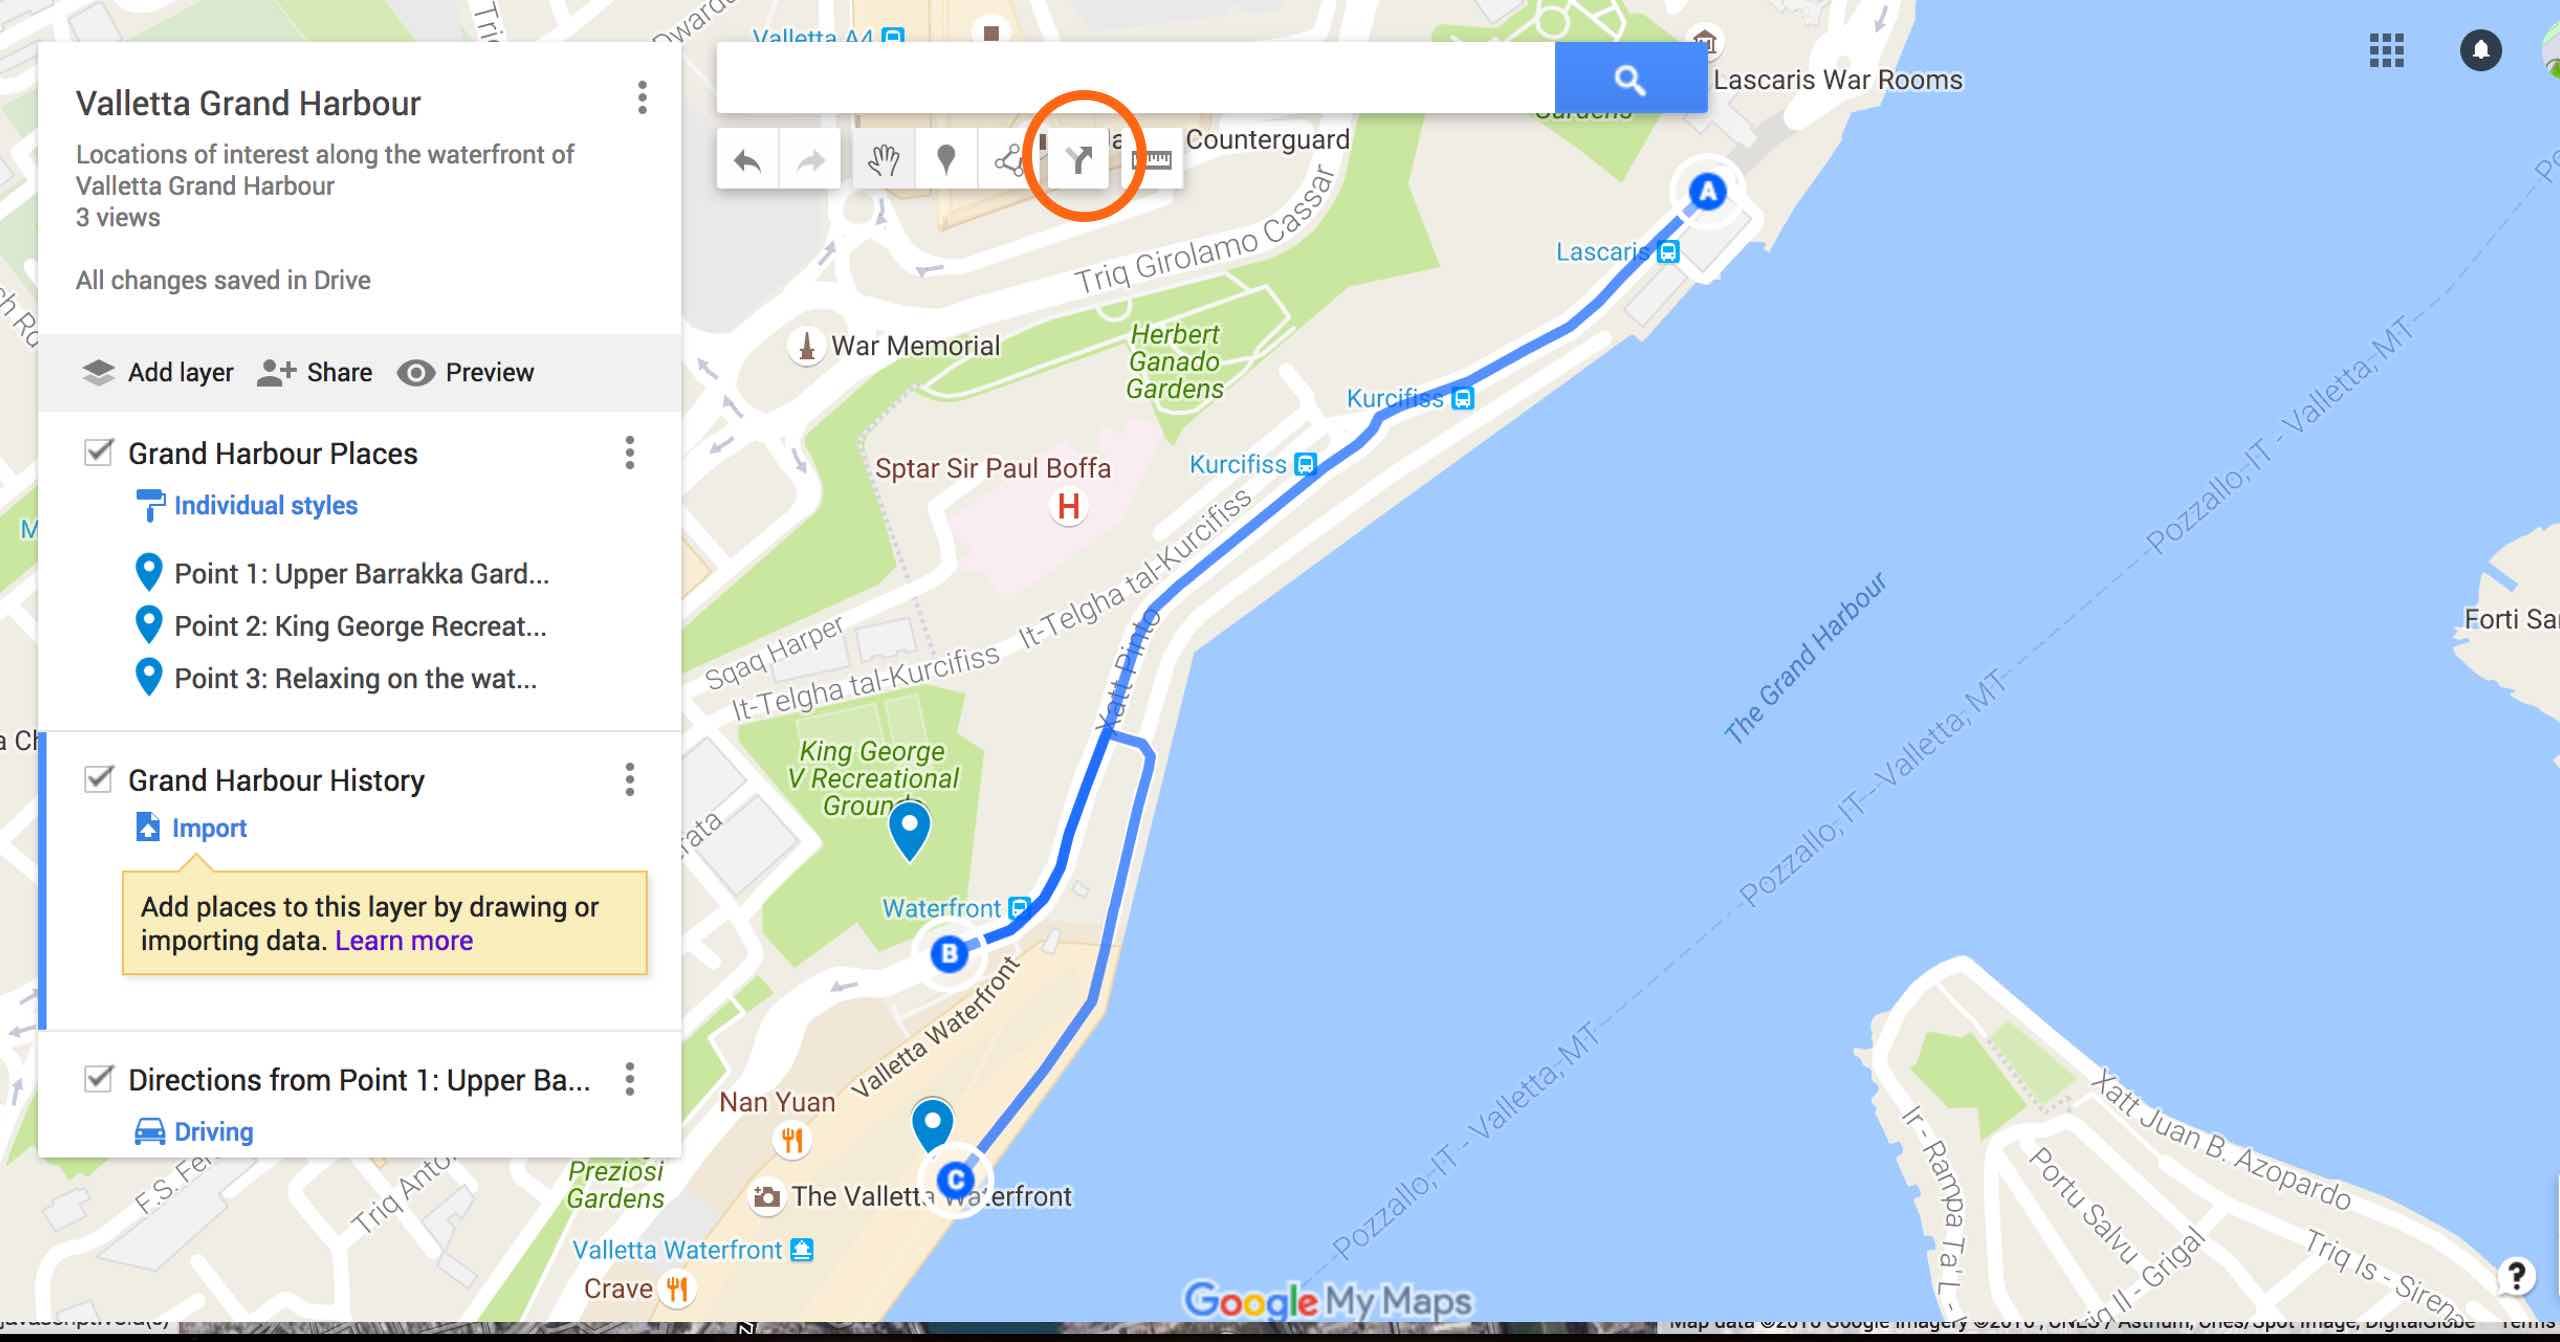
Fig 7 – The Google Map directions route.
Adding a route can sometimes be useful, and it’s simple to do. Click on the tool highlighted with the orange circle in Fig 7 and then click on a location point you have already added. The left panel will dispay the route list, with a box underneath for adding another journey point. Each point is given a letter. I usually use another layer (see below) for this so users can turn off the direction route line if they want.
Step 8. Adding another ‘layer’
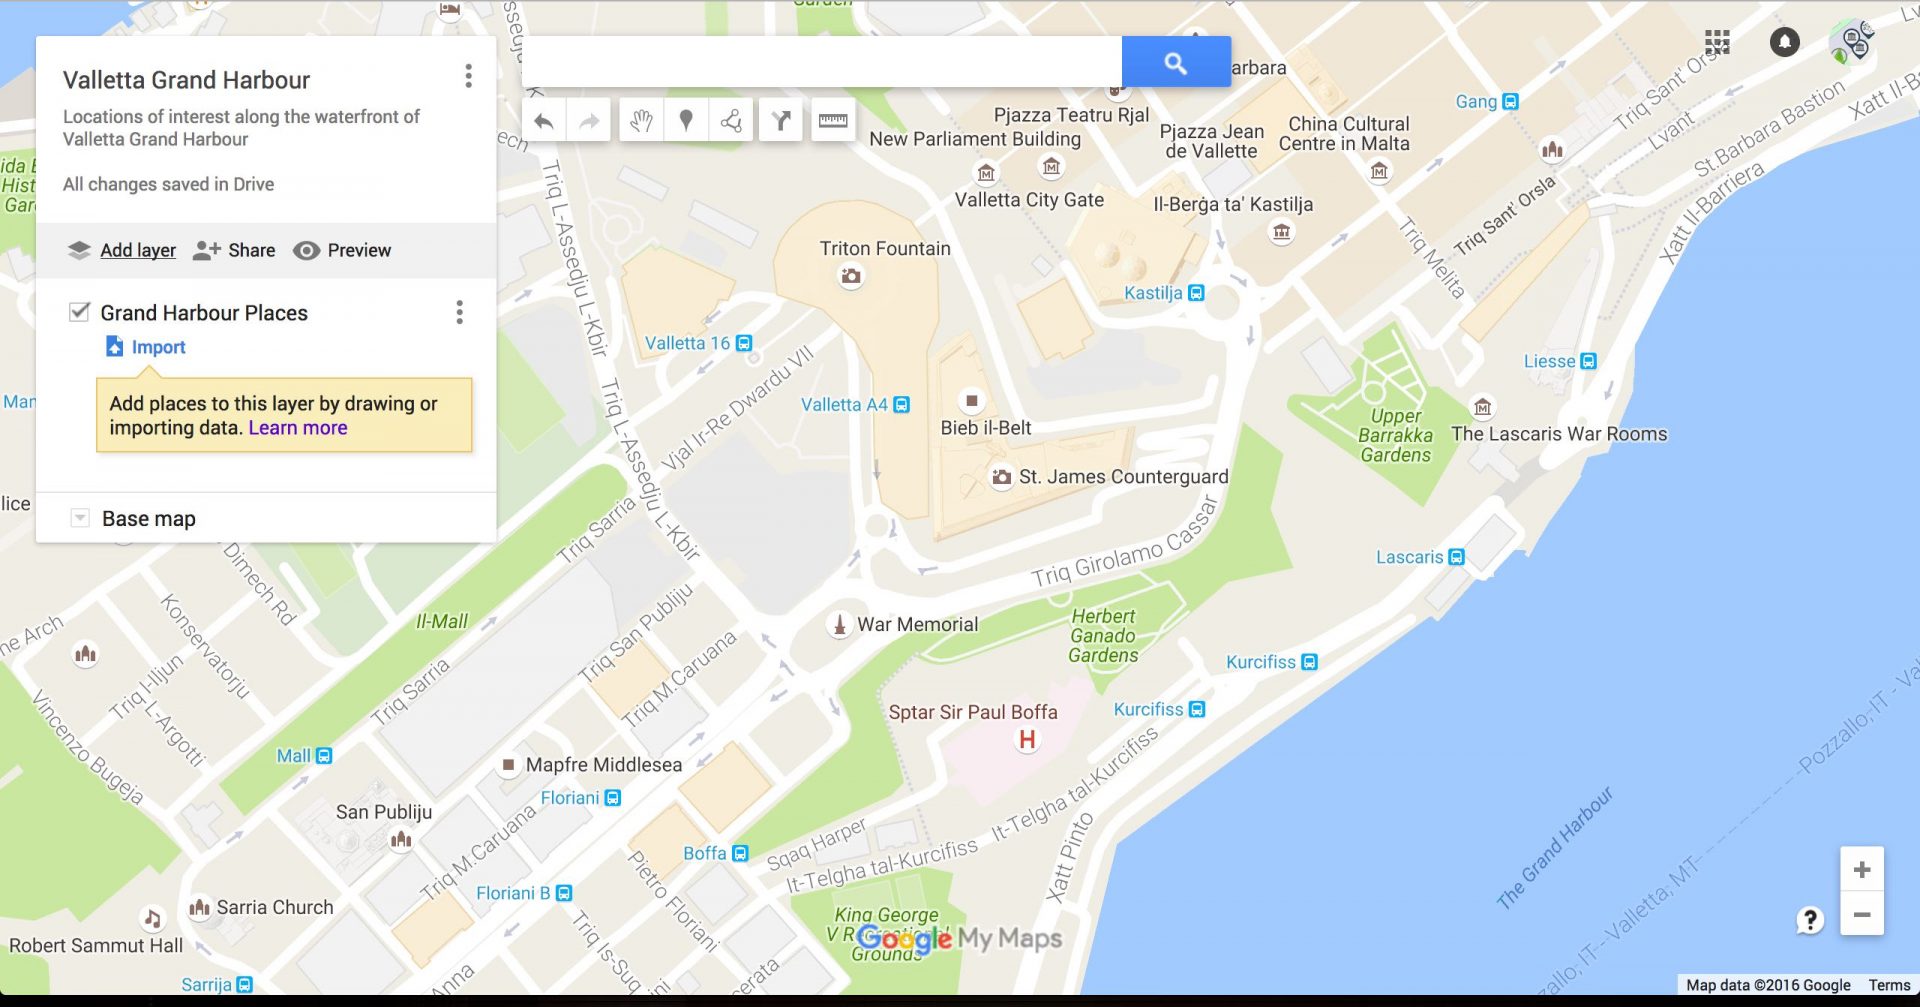
Fig 8 – First layer of the Map.
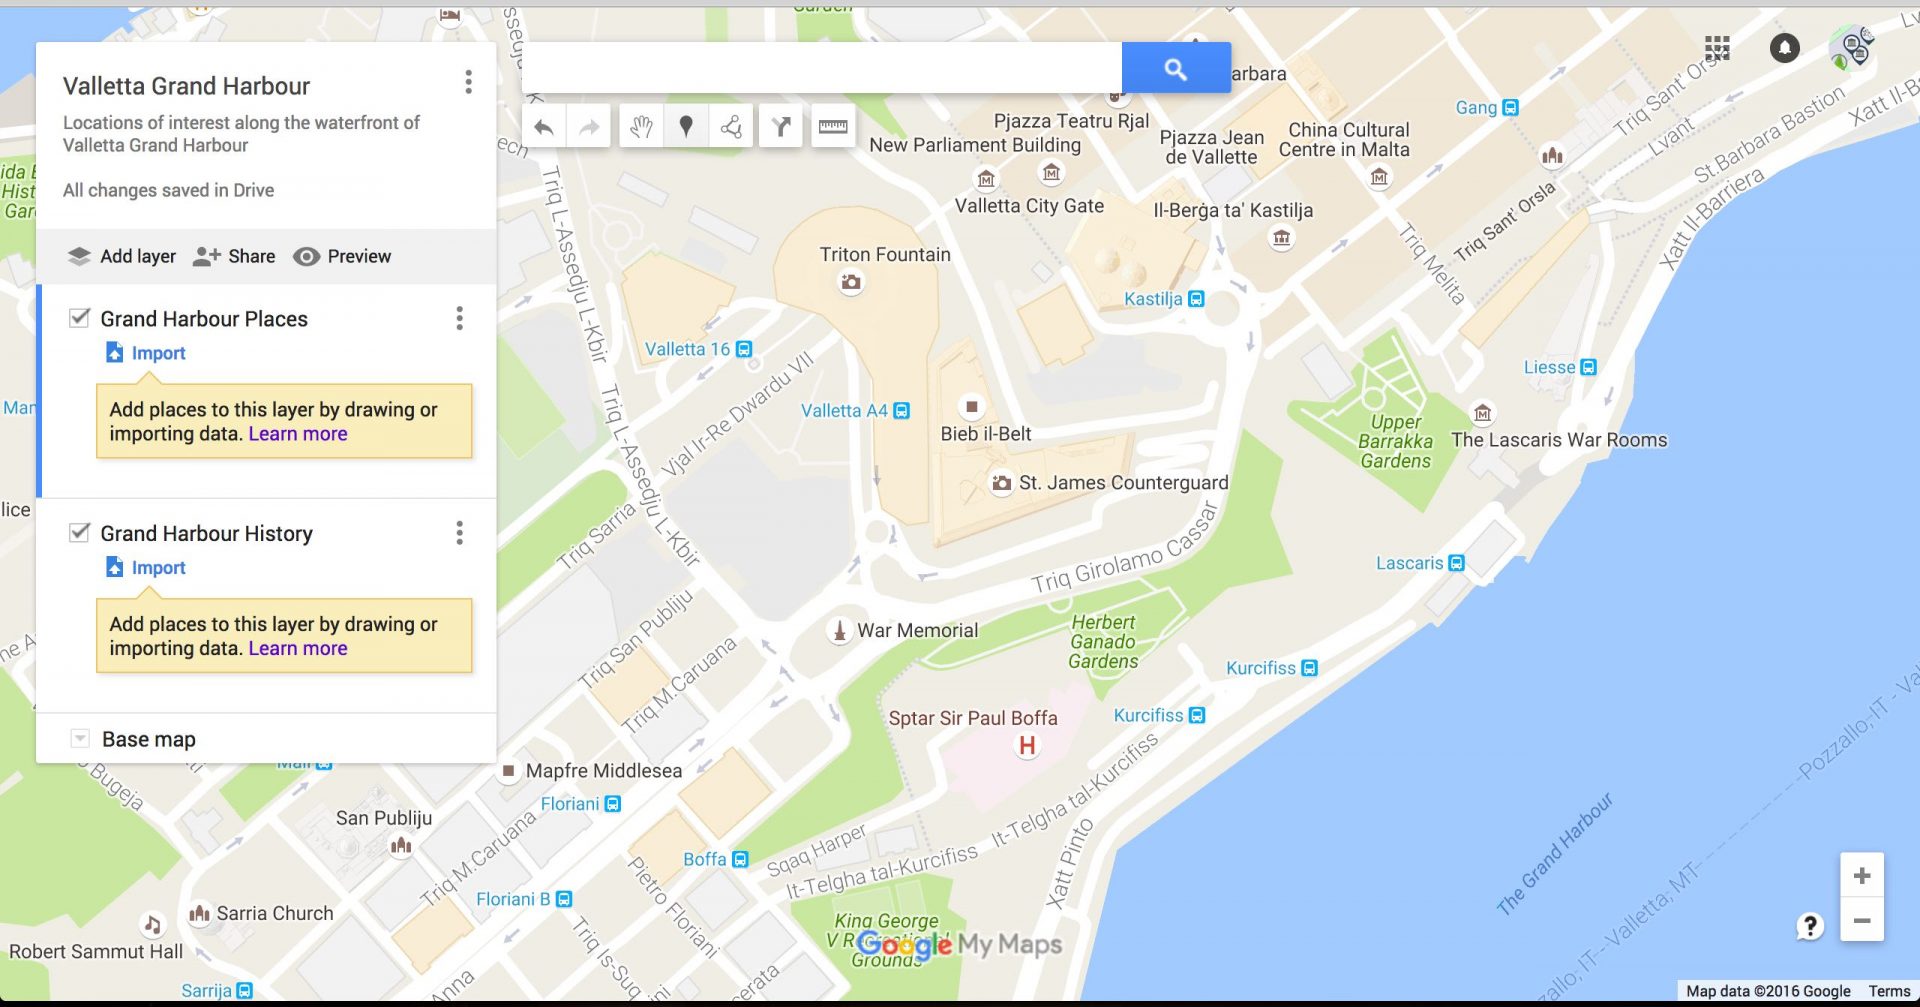
Fig 9 – Two layers on the Google Map.
See Fig 8 and Fig 9 for adding layers to your Google Map, using the left hand panel to add title and location points. The menu at the top left of each layer (the three dots icon) will allow you to give the layer a name, delete it or open data (for a more advanced tutorial). As soon as you add a location (as described in Step 4 and 6 above), a link will appear which allows you to ‘individually style’ your layers. This allows you to group them by colour, or numerical list etc. Click on it and experiment.
Step 9. Map privacy – sharing and making it public
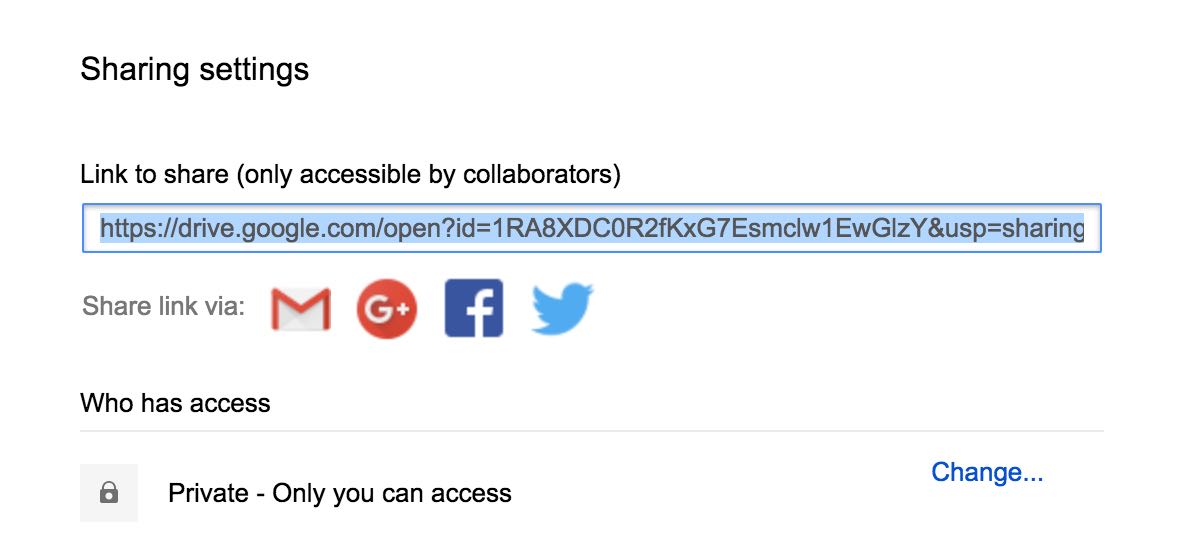
Fig 10 – Sharing, privacy permissions and control.
To make your map sharable, you need to click on the ‘Share’ link in the tool strip in the left hand panel. A pop up window will appear with the usual Google Drive sharing permissions in it. You can either make fully public, only available to people who have the link, or keep it private.
Step 10. Embedding the map
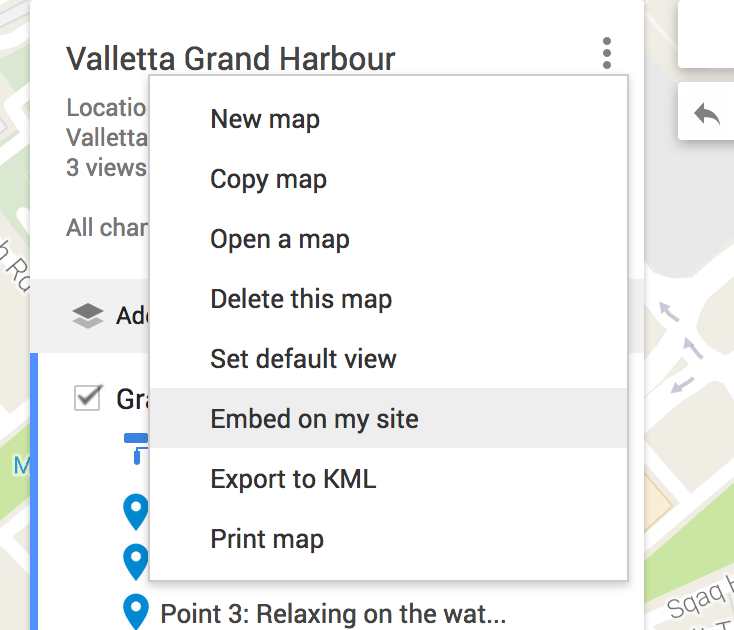
Fig 11 – The Embed my site menu link.
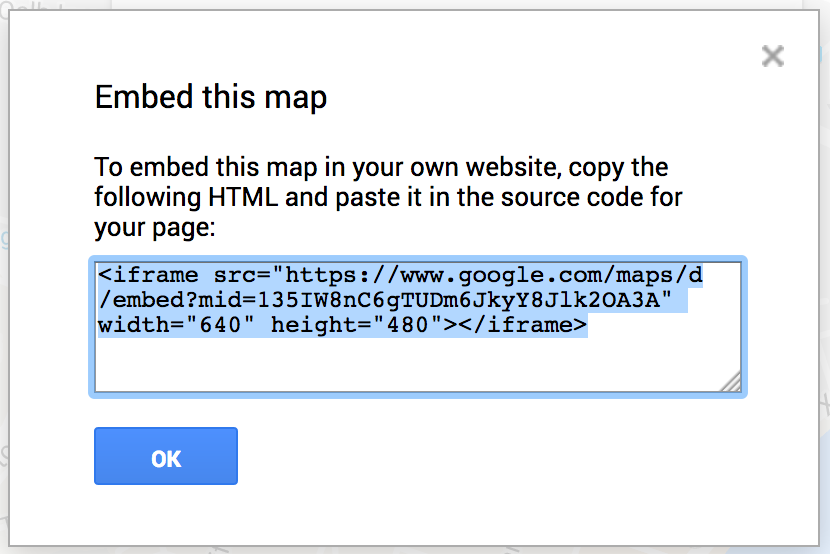
Fig 12 – Showing the embed code window.
To embed the map on a webpage you must have already made it public. Once you’ve done that, click on the top left three-dot icon menu in the left panel and select ‘Embed on my site’ (Fig 11). A pop up window will appear with the code in it (Fig 12). Simply copy this code and paste into any html web page and the map will show up. You can customise size using width and hieght parametrs in the embed code as shown.
That’s it, you’re done! I hope you enjoyed making a custom Google Map. I’ve included a few helpful links below for further information on making Google maps. _ Leave any questions, tips or advice in the comments below. _
Links
- Google support – add places and search results
- Google support – style and label map content
- Useful alternate tutorial on custom Google Maps